Card Selection Strategy
Learn how to evaluate and prioritize cards in Splendor Duel. A framework for understanding cost efficiency, timing your purchases, and denying your opponent.
15 min read
Why Card Selection Wins Games
Every turn in Splendor Duel presents a critical decision: which card deserves your attention? New players tend to grab whatever looks affordable or flashy, but experienced players know that card selection is the single most consequential skill in the game. The difference between a well-chosen card and a mediocre one compounds across the entire match, because each card you purchase reshapes the cost landscape of every future card. A strong card selection framework does not just tell you what to buy right now; it tells you how each purchase fits into a plan that leads to one of the three victory conditions within a tight turn economy.
This guide provides a structured approach to evaluating cards, understanding how their value shifts across the three phases of a game, and using your purchases both offensively and defensively. If you have already read through our beginner's guide and understand the gem economy, you are ready to deepen your card evaluation skills.
The Card Value Framework
When a row of cards sits in front of you, it can feel overwhelming to weigh all the variables at once. Breaking card evaluation into four distinct dimensions makes the decision far more manageable. Every card in Splendor Duel can be assessed across these four axes, and understanding how to weight each axis depending on the game state is the core of strong play.
Points Per Gem Cost
The most intuitive metric is raw efficiency: how many prestige points does this card yield relative to the total gems required to purchase it? All Level 2 cards cost exactly 7 gems total, but they vary from 1 to 2 prestige points (with the rare gold card at 5), so efficiency varies significantly across the tier. However, this calculation must account for your existing bonuses. If you already hold two blue bonuses and a card costs 3 blue and 2 red, your effective cost is only 2 gems, which dramatically changes the efficiency math. Always calculate your actual cost after applying bonuses, not the printed cost on the card.

Bonus Value
The gem bonus printed on a card is often worth more than the prestige points it carries, particularly in the first half of the game. Each bonus you collect permanently reduces the cost of every future card that requires that color by one gem. Think of a bonus as a gem that pays dividends every single turn for the rest of the match. A blue bonus on a zero-point Level 1 card might not look exciting, but if three of the visible Level 2 and Level 3 cards require blue, that single bonus could save you 3 or more gems across your remaining purchases. The compounding effect is enormous: two bonuses in the same color can make mid-tier cards essentially free in that color, opening up explosive multi-card turns later in the game.
Crown Value
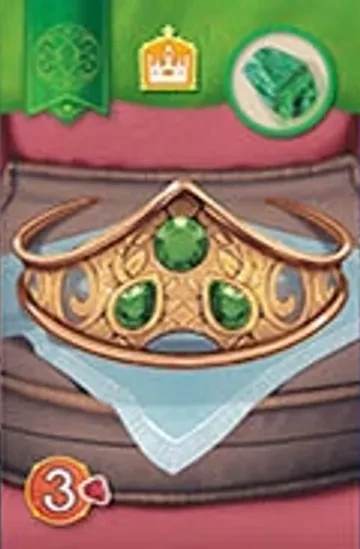
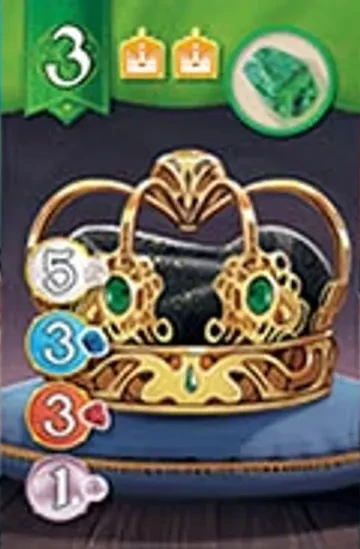
Crowns contribute to the crown victory condition (10 crowns) and also help you qualify for Royal cards, which provide both prestige points and additional crowns. A card with a single crown carries hidden strategic weight that goes beyond its printed stats. Crowns are somewhat scarce across the card pool, so each crown you acquire narrows your opponent's path to a crown victory while widening your own. Even if you are not explicitly pursuing a crown win, accumulating crowns incidentally pressures your opponent into defensive plays and keeps the crown victory path as a credible threat, which is itself a strategic advantage.
Ability Power
Certain cards carry special abilities that trigger upon purchase, such as taking an extra gem, taking another turn, or stealing a gem from your opponent. These abilities vary wildly in impact, and evaluating them correctly requires contextual thinking. An ability that grants you an extra turn is almost always powerful because tempo is precious in a game that typically lasts 15-25 turns. An ability that lets you steal a specific gem from your opponent is situationally devastating: it both advances your position and sets back theirs, creating a two-gem swing. As a rule of thumb, abilities that generate immediate, unconditional value (extra turns, free gems) are more reliable than abilities requiring specific board states, though the conditional ones can be game-winning when their conditions are met.
Game Phase and Card Priorities
Card value is not static. A card that would be a mediocre pick on turn 3 might be the best possible purchase on turn 12, and vice versa. Understanding how priorities shift across the three phases of a Splendor Duel game is essential to making the right call every turn.
Early Game: Building the Engine (Turns 1-5)

The opening turns are all about infrastructure. Your goal is to acquire Level 1 cards that provide bonuses aligned with the mid-game and late-game cards you anticipate purchasing. Prestige points on Level 1 cards are a nice bonus, but they should almost never be the primary reason you buy a card this early. Instead, scan the Level 2 and Level 3 rows and ask yourself: what colors appear most frequently in their costs? Those are the bonuses you should be targeting right now.
Diversity of bonuses matters during the early game, but focused diversity matters more. Having one bonus in each of four colors is less powerful than having two bonuses in two colors that align with the strongest Level 2 cards on the board. Look for overlapping cost requirements in the visible higher-level cards and build toward those specific colors. If both a 3-point Level 2 card and a 4-point Level 3 card require heavy green investment, acquiring two green bonuses early is far more valuable than spreading across four colors evenly.
Tip: Before purchasing any Level 1 card, glance at the Level 2 and Level 3 rows. Ask yourself, "Which future card does this bonus make affordable?" If you cannot identify at least one strong target, the card may not be worth the turn.
Early game priority order: Bonus color alignment > Abilities > Crowns > Points
Mid Game: The Transition (Turns 6-12)
The mid game is where good players separate from great ones. You should now have 2-4 bonuses and need to start converting your engine into actual progress toward a win condition. Level 2 cards are the bridge: they offer a combination of points, bonuses, and occasionally crowns or abilities that let you both extend your engine and accumulate victory progress simultaneously. The best mid-game purchases are cards that do double duty: a Level 2 card that gives you 2 prestige points and a useful bonus or ability is worth significantly more than a card offering only points with no bonus, because the bonus will still be paying off during your late-game purchases.

This is also the phase where you should be actively reading the board to identify which win condition is most achievable. If you notice that you have already accumulated 5-6 crowns incidentally, pivoting toward a crown victory may be faster than grinding toward 20 prestige. If you have bonuses in four different colors, a color victory might be just one or two cards away. The mid game is your last chance to pivot strategy without wasting too many turns; by the late game, you need to be committed to a specific path.
Mid game priority order: Points + Bonus (double duty) > Crown progress > Abilities > Raw points
Late Game: Closing It Out (Turns 13+)
By the late game, every single turn matters. You should know exactly which win condition you are pursuing and be buying cards that move you directly toward it. Level 3 cards are your primary closers: they carry the highest point values in the game (3-6 prestige points each) and their steep costs (8-12 gems total) should now be manageable thanks to the bonuses you accumulated earlier. A well-built engine can purchase Level 3 cards for as few as 2-3 actual gems, which is an extraordinary return on the investment you made during the opening turns.

The critical late-game skill is knowing when to stop building and start racing. If your opponent is within one or two turns of winning, spending a turn on a bonus-only card is a luxury you cannot afford. Conversely, if the board does not present an immediate closer, it may be worth buying one more engine card to make a devastating purchase possible next turn. Count your opponent's points, crowns, and color bonuses every turn in the late game; the information should directly inform whether you race forward or take a defensive action.
Tip: In the late game, calculate exactly how many turns you need to win under your current plan. If your opponent can win in fewer turns, you must either accelerate your plan or disrupt theirs through card denial.
Late game priority order: Win condition progress > Disrupting opponent > Everything else
Card Denial: The Defensive Dimension
One of the most underappreciated aspects of Splendor Duel strategy is that every card purchase has two effects: it strengthens your position, and it removes that card from your opponent's options. Strong players think about both dimensions simultaneously. Card denial means deliberately buying or reserving a card not primarily because it helps you, but because it would be devastating in your opponent's hands. This is not just a defensive reflex; it is a proactive weapon that can shatter your opponent's game plan.
Reservation is the purest form of denial because it removes a card from the market without requiring you to pay its full cost immediately. If your opponent is one card away from a color victory and the pearl card they need is sitting on the board, reserving that card (even if you never intend to buy it) can be the single highest-value play available. The cost of using a turn on reservation is real, but the cost of letting your opponent win is infinite.
Card denial is most critical in three situations:
- Your opponent is close to a win condition: Block the specific card that would push them over the threshold. This is non-negotiable; if you can see the winning card, take it.
- A card would give your opponent a major engine advantage: If a card would give them their third bonus in a color that unlocks multiple cheap purchases, denying it early can cripple their mid-game plans.
- Royal cards are in play: Royal cards reward reaching crown thresholds. If your opponent is one crown away from claiming a Royal card worth 3 points, buying the crown card they need is a massive swing: you deny them both the crown and the Royal card it would have triggered.
Tip: Card denial does not have to be purely sacrificial. The best denial plays are cards that help your position and hurt your opponent's. Always look for cards that serve double duty before committing to a pure denial purchase.
Building Toward Win Conditions Through Selection
Strategic card selection is not just about picking the best individual card each turn; it is about building a coherent sequence of purchases that efficiently reaches one of the three victory conditions. Each win condition demands a different card selection pattern, and recognizing which pattern the game state supports is a hallmark of advanced play.
Prestige Victory (20 Points)
The prestige path requires a strong engine of bonuses in the early game feeding into high-point Level 2 and Level 3 purchases in the mid and late game. Your card selections should prioritize bonus colors that align with the most point-dense cards available. Level 3 cards are your primary point source, so every early bonus should be working toward making specific Level 3 cards affordable. Royal cards also contribute significant prestige, so do not ignore crown accumulation entirely; a Royal card is essentially free points if you cross the crown threshold incidentally.
Crown Victory (10 Crowns)
The crown path benefits from selecting crown-bearing cards across all three levels. Crown-heavy Level 1 cards are particularly valuable because they provide both a crown and a bonus, letting you advance the crown count while still building an engine. Many players overlook the crown victory because it appears slow, but a focused crown strategy can close games faster than prestige because crown cards tend to be cheaper than high-point cards. Select cards where crowns come as an added benefit alongside useful bonuses or points; pure crown-only selections are rarely efficient.
Color Victory (10 Points in One Color)
The color victory demands focused card selection. You need 10 or more prestige points on cards of a single color, which means concentrating your purchases in one bonus color. Associate cards count as the color of the card they are grouped with, making them powerful tools for this path. This strategy tends to emerge organically during the mid game when you realize you have been stacking points in one color. High-point Level 3 cards (3-6 points each) in your chosen color are the key: two of them plus a couple of Level 2 cards in the same color can cross the threshold quickly.
Common Card Evaluation Mistakes
Even experienced players fall into predictable traps when selecting cards. Recognizing these patterns in your own play is the fastest route to improvement. For a broader look at strategic errors, see our common mistakes guide.
-
Over-valuing prestige points on Level 1 cards. A Level 1 card with 1 prestige point and no useful bonus is almost always worse than a 0-point card with a strategically aligned bonus. The bonus will generate far more than 1 point of value over the course of the game through cheaper future purchases. Resist the urge to grab points early at the expense of engine building.
-
Ignoring bonus diversity until it is too late. If all your bonuses are concentrated in one or two colors, you become highly dependent on specific cards appearing in the market. A spread of bonuses across 3-4 colors gives you flexibility to pivot strategies and take advantage of whatever the market offers. Build focused diversity: not random spread, but deliberate coverage of the colors most represented across the available Level 2 and Level 3 cards.
-
Failing to track your opponent's collection. Card selection is not a solo puzzle. If you are not counting your opponent's prestige points, crowns, and color bonuses every turn, you are making decisions with incomplete information. Our reading your opponent guide provides a concrete checklist for what to track every turn. Strong players know exactly how close their opponent is to each win condition at all times and factor this into every card selection decision.
-
Buying cards just because you can afford them. Having the gems to purchase a card does not mean you should. Every turn spent buying a card that does not advance your game plan is a turn your opponent uses to advance theirs. Before each purchase, ask: "Does this card get me closer to winning, or am I just buying it because it is convenient?" Discipline in card selection is the difference between efficient play and aimless accumulation.
-
Neglecting reservation as a strategic tool. Many players treat reservation as a desperation move, but it is actually one of the most flexible tools in the game. Reserving a key Level 3 card early ensures it is available when your engine is ready to purchase it, and it simultaneously denies that card to your opponent. A well-timed reservation can define the outcome of a game.
Putting It All Together
Card selection in Splendor Duel is a dynamic, multi-layered decision that requires you to balance your own game plan against your opponent's, weigh short-term gains against long-term payoffs, and constantly reassess as the market and board state evolve. The framework outlined here (evaluating points efficiency, bonus value, crown value, and ability power while adjusting weights based on game phase) gives you a structured approach to what can otherwise feel like an overwhelming decision space. Practice calculating your actual gem costs after bonuses, discipline yourself to scout the Level 2 and Level 3 rows before every Level 1 purchase, and never stop tracking your opponent's progress toward their win conditions. The players who master card selection do not just make good individual picks; they build coherent, efficient paths to victory turn after turn. For a closer look at which cards to target in the opening specifically, see our opening strategy guide. Use our card comparison tool to evaluate specific cards side-by-side, or check the tier list to see how we rank every card in the game.