Beginner's Guide to Splendor Duel
Everything you need to know to start playing Splendor Duel. Learn the basics of gem collection, card purchasing, and the three paths to victory.
16 min read
What Is Splendor Duel?
Splendor Duel is a two-player reimagining of the classic board game Splendor, designed by Marc André and Bruno Cathala. While the original Splendor accommodates up to four players and revolves around a relatively straightforward gem-trading engine, Splendor Duel strips the experience down to a tense head-to-head contest and layers on new mechanics that reward careful planning and tactical aggression in equal measure. Games typically last between 20 and 30 minutes, making it an ideal choice when you want something meatier than a filler game but don't have time for a full evening affair. If you've played the original, you'll recognize the DNA immediately (gem tokens, development cards, and the satisfying feeling of watching your economic engine click into place), but the duel format introduces enough fresh ideas that it genuinely feels like its own game rather than a simple reskin.
At its heart, Splendor Duel is a race. Both players are building toward one of three distinct victory conditions, and the tension comes from reading your opponent's strategy while advancing your own. Every turn presents a genuine decision: do you grab the gems you need, deny your opponent a critical token, or pivot your strategy entirely based on what just appeared in the card market? This guide will walk you through every component, every rule, and every concept you need to sit down and play your first game with confidence. Once you are comfortable with the basics, our guides on the gem economy, card selection strategy, and win conditions will take your play to the next level.
Components and Setup
The Gem Board
The most immediately striking difference between Splendor Duel and its predecessor is the gem board, a 5x5 grid that holds 25 gem tokens at the start of each round. In the original game, gems sit in neat stacks sorted by color and you simply take what you need. Here, the tokens are drawn randomly from a bag and placed onto the board in a specific arrangement, which means the spatial layout of the gems matters enormously. You can't just grab any three tokens you want; you have to find them in specific patterns on the board, and every token you take reshapes what's available for your opponent on their next turn.
The gem tokens come in six colors: blue, white, green, red, and black (the five standard gem colors), plus pink pearl tokens and gold tokens. Pearl and gold tokens play special roles that we'll cover shortly. When the board runs low on tokens during play, a replenishment phase refills it from the bag, so the available options shift constantly throughout the game.
Development Cards
Development cards are the core of your strategy. They are arranged in three rows on the table, representing three levels of increasing cost and power. At any given time, the market displays several face-up cards from each level, and each level also has a face-down deck from which new cards are drawn as others are purchased. Every development card shows a gem cost (paid in tokens), a permanent gem bonus (which effectively makes future cards cheaper), a prestige point value (which may be zero on cheaper cards), and sometimes a crown symbol or a special ability.
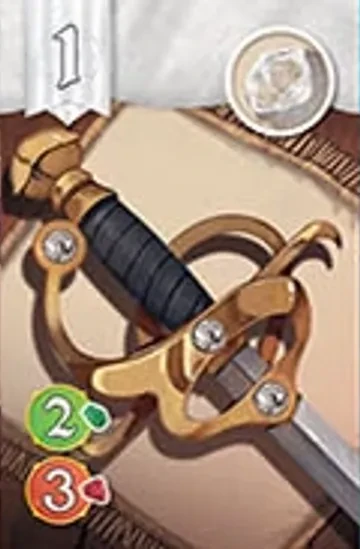
Level 1 cards are the workhorses of the early game. They are cheap, often costing just two or three tokens, and while they rarely provide prestige points on their own, their permanent gem bonuses form the backbone of your purchasing engine. Think of them as investments: each Level 1 card you buy makes every subsequent purchase a little easier. A card that provides a permanent blue bonus, for instance, reduces the blue gem cost of every future card you consider by one. Stack a few of these bonuses together and suddenly those expensive Level 2 and Level 3 cards start looking very affordable.
Tokens: Gems, Pearls, and Gold
Understanding the token types is essential. The five standard gem colors (blue, white, green, red, black) work exactly as you'd expect; you spend them to match the colored costs printed on development cards. Pearl tokens are a distinct resource used by certain cards, particularly at higher levels, and they cannot substitute for other colors. Gold tokens are the wild cards of Splendor Duel: each gold token can stand in for any single gem color when making a purchase. They are rare and powerful, and acquiring one always involves a trade-off, as we'll see when we discuss turn actions.
Tip: You can hold a maximum of 10 tokens at any time. If you ever exceed this limit, you must immediately return tokens to the bag until you're back to 10. Plan your acquisitions carefully so you don't waste a turn grabbing gems you'll have to give right back.
Turn Structure
On your turn, you must perform exactly one of three actions: take gems from the board, purchase a development card, or reserve a development card. You cannot pass, and you cannot combine actions. This constraint is what gives the game its rhythm and tension: every turn you spend collecting gems is a turn you're not buying cards, and vice versa.
Action 1: Take Gems from the Board
When you choose to take gems, you select up to three adjacent Gem or Pearl tokens in a straight line (horizontal, vertical, or diagonal). The tokens can be any combination of colors, including the same color. However, taking three tokens of the same color or two Pearls gives your opponent a Privilege, so weigh the cost carefully. You can also take just two adjacent tokens or even a single token if preferred. Gold tokens cannot be taken with this action; they can only be obtained by reserving a card.
The spatial constraint on gem-taking is where much of Splendor Duel's tactical depth lives. You aren't just choosing which colors you want; you're analyzing the board layout to find the best available line, while also considering what your selection will leave behind for your opponent. Sometimes the strongest move is to take gems you don't even need, purely to deny your opponent a critical cluster.
Tip: Before grabbing gems, always scan the board for what your opponent needs. Denying a key token can be more valuable than advancing your own position, especially in the late game.
Action 2: Purchase a Development Card
To purchase a card, you pay its gem cost using a combination of your tokens and your permanent bonuses from previously purchased cards. Each permanent bonus you've accumulated effectively reduces the cost by one token of that color. If a card costs three blue, two white, and one green, and you already have two permanent blue bonuses and one white bonus, you'd only need to spend one blue token, one white token, and one green token from your supply. Spent tokens go back into the bag (not onto the board), so they won't be immediately available to either player.

When you buy a card, you gain its permanent gem bonus immediately, along with any prestige points and crowns it provides. Some cards also carry special abilities, the most notable being the "take another turn" privilege, which can create explosive swing turns. Purchased cards stay in front of you for the rest of the game, and their bonuses stack, which is the fundamental engine-building mechanic that makes Splendor so satisfying.
Action 3: Reserve a Development Card
Reserving is the most subtle action available to you. When you reserve a card, you first take a Gold token from the board, then take a card from the market (or from the top of any level's deck) and place it face-down in front of you, hidden from your opponent. You can hold up to three reserved cards at a time, and you cannot reserve if no Gold tokens remain on the board. On a future turn, you can purchase a reserved card just as you would a face-up card from the market. Reserving serves multiple purposes: the Gold token gives you a wild resource, it lets you lock in a card you want before your opponent can grab it, and it gives you information advantage since your opponent can't see exactly what you've taken. The trade-off is that you don't gain any permanent bonuses or points until you actually purchase the reserved card, so it's a tempo investment that needs to pay off later.
Card Levels in Detail
Level 1: Building Your Foundation
Level 1 cards are inexpensive and almost always worth buying early. They typically cost between three and six tokens total, provide a single permanent gem bonus, and carry zero to one prestige points. The strategic value of Level 1 cards lies entirely in their bonuses: each one you purchase makes your future turns more efficient. A strong opening often involves buying two or three Level 1 cards in the first several turns to establish a broad base of bonuses across multiple colors. Don't underestimate the cards with zero prestige points; their bonuses are just as valuable as any other Level 1 card, and they're often cheaper to acquire.
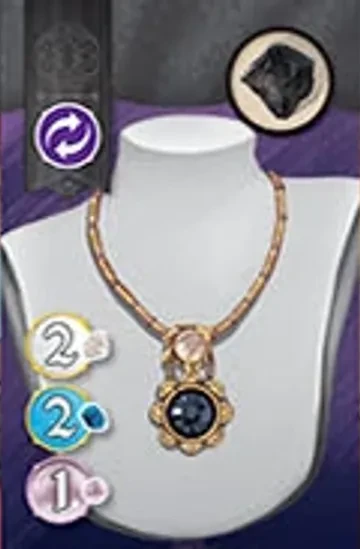
Level 2: The Middle Game
Level 2 cards represent the transition from engine-building to point-scoring. They cost more (each requiring exactly seven total gems across two or three colors), but they reward you with meaningful prestige points (one to two, or five for the rare gold card) and sometimes carry crowns or special abilities. By the time you're buying Level 2 cards, your permanent bonuses should be doing a lot of the heavy lifting, allowing you to purchase these mid-range cards for just a token or two out of pocket. Level 2 is also where you'll find many of the crown-bearing cards that can propel you toward a crown victory.
Level 3: The Finishers
Level 3 cards are expensive, powerful, and often game-ending. They cost between eight and twelve total gems and some require pearl tokens. They provide large prestige point values (three to six) and may carry up to two crowns. You generally won't buy more than one or two Level 3 cards in a game, but each one can dramatically shift the balance of power. Timing your Level 3 purchase is critical: buy too early and you've drained your token supply for a single card; wait too long and your opponent may cross a victory threshold before you get the chance.

Royal Cards
Royal cards sit in a separate row below the board. They are not purchased with gems; instead, you earn a Royal card when your purchased development cards accumulate three crowns, and again at six crowns. Each time you hit a threshold, you immediately select one of the available Royal cards and add it to your collection. Royal cards provide prestige points (two to three each), and three of the four also grant a special ability, such as stealing a gem from your opponent, taking another turn, or gaining a Privilege. In a close game, those extra points and abilities can be the difference between victory and defeat.

There are only a handful of Royal cards in any given game, so they function as a limited and contested resource. If both players are accumulating crowns at a similar rate, the first to hit a threshold gets the better selection. This creates an interesting sub-game: do you pursue crowns aggressively to snag the best Royal cards, or do you focus on raw prestige points and let your opponent have them?
Tip: Reaching crown thresholds before your opponent lets you pick first from the Royal card row. Since Royal cards carry 2-3 prestige points plus powerful abilities, even a small crown lead can translate into a significant advantage.
The Three Paths to Victory
Splendor Duel offers three distinct win conditions, and understanding all of them is essential, not just so you can pursue one, but so you can recognize when your opponent is close to achieving one.
Prestige Victory: 20 Points
The most straightforward path. If you reach 20 or more prestige points at the end of your turn, you win. Prestige comes from development cards and Royal cards, and virtually every competitive game involves at least one player working toward this threshold. A typical prestige victory relies on a solid foundation of Level 1 bonuses, a few chunky Level 2 cards, and one or two Level 3 finishers to push over the top. It's the most "honest" win condition in the sense that it rewards balanced, efficient play across the whole game.
Crown Victory: 10 Crowns
The crown victory is an alternate route that bypasses the prestige race entirely. If you accumulate 10 or more crowns across your purchased development cards, you win immediately, regardless of your prestige total. Crown victories tend to be faster and more aggressive than prestige victories, because crown-bearing cards are often cheaper than high-prestige cards. The danger of the crown path is that it's visible: your opponent can count your crowns just as easily as you can, and a savvy opponent will start blocking your access to crown cards once they see the threat developing. Still, the crown victory is a potent weapon, especially against opponents who tunnel-vision on prestige.
Color Victory: 10 Points in One Color
The most dramatic win condition. If you accumulate 10 or more prestige points on cards of the same color, you win immediately, regardless of your total prestige score. A card's color is determined by its bonus gem, and Associate cards count as the color of the card they are grouped with. This means a focused strategy of stacking high-point cards in a single color can end the game before an opponent pursuing 20 total points gets there. The color victory rewards deep investment in one color and clever use of Associate cards to concentrate points.
Tip: Even if you're not actively pursuing the color victory, keep a mental note of how many prestige points you've accumulated in your strongest color. Sometimes you'll find yourself one card away from a color win by accident, and recognizing that opportunity can steal a game you were otherwise losing.
Essential Tips for New Players
Now that you understand the rules, here are the strategic principles that separate beginners from intermediate players.
Build your engine before chasing points. It's tempting to save up for a flashy Level 3 card right away, but you'll almost always be more successful if you spend your first several turns buying cheap Level 1 cards. Our gem economy guide covers this compound advantage concept in depth. Each permanent bonus you accumulate makes every future purchase more efficient, and that compounding advantage adds up quickly. A player who buys four Level 1 cards before touching Level 2 will generally outpace a player who went straight for expensive cards, because the first player's bonuses are doing the work of multiple gem tokens every single turn.
Pay attention to your opponent at all times. Our reading your opponent guide covers this in depth, but the core idea is simple: Splendor Duel is not a solitaire optimization puzzle. Your opponent's card purchases, gem selections, and crown count should all factor into your decisions. If they're sitting at eight crowns, you need to either block crown cards or race to your own win condition immediately. If they've been quietly collecting bonuses in every color, check whether they're one card away from a color victory. The best players are always tracking both their own path and their opponent's.
Manage your token economy. Tokens are a means to an end, not a goal in themselves. Don't hoard gems for the sake of having a full hand; every token sitting unused in your supply is a wasted resource. This is one of the most common mistakes new players make. Try to spend tokens the turn after you acquire them, maintaining a lean supply that's targeted toward your next purchase. Remember that the 10-token limit is a hard cap, and exceeding it wastes your turn's effort.
Use reservations strategically. Reserving a card is powerful but costly in tempo. The best time to reserve is when you see a card that's perfect for your strategy but you can't afford it yet, or when your opponent is about to buy a card that would give them a decisive advantage. Don't reserve speculatively; every reservation is a turn you could have spent buying a card or collecting gems.
Stay flexible. The strongest players don't commit to a single win condition from the start. They build a strong foundation and then pivot toward whichever victory path opens up based on the cards that appear in the market and the choices their opponent makes. If crown cards keep appearing and your opponent is ignoring them, lean into crowns. If you've naturally accumulated diverse bonuses, watch for the color victory. Rigidity is the enemy of good Splendor Duel play.
Watch the gem board, not just the cards. New players tend to fixate on the card market and treat gem collection as an afterthought. But the spatial arrangement of the gem board creates tactical opportunities every turn. Sometimes the best move is taking gems you don't need in order to deny your opponent a critical pair, or grabbing a gold token to maintain flexibility even when you have a clear color need. The board is a shared resource, and controlling it is half the battle.
Where to Go from Here
Now that you have a solid understanding of the rules and basic strategy, the best thing you can do is play. Your first few games will feel clumsy as you learn to read the board and evaluate cards, but the patterns will start clicking quickly. Pay attention to what works and what doesn't, and don't be afraid to experiment with different strategies: pursuing crowns one game, aiming for a color victory the next, or trying a rush strategy that skips Level 1 cards entirely just to see what happens. Every loss teaches you something, and Splendor Duel rewards the kind of flexible, attentive play that only comes from experience.
When you are ready for deeper strategy, check out these guides:
- Opening Strategy: how the best players spend their first five turns
- Understanding the Gem Economy: master gem collection patterns and denial strategies
- Card Selection Strategy: learn how to evaluate and prioritize cards
- Win Conditions Explained: a deep dive into the three paths to victory
- Reading Your Opponent: track your opponent's strategy and time your defensive plays
- Common Mistakes to Avoid: eliminate the errors that cost you games
You can also browse every card in the game or use our card comparison tool to evaluate cards side-by-side.